After you have set up your site with a member of the GO Smart team, you will likely be eager to launch your first grant. Navigate to the Grant Editor tab to do the following:
- Create and modify the names of your programs from Programs.
- Manage the logistics and settings from the Program Cycles Editor.
- Create the content of each program cycle form from Cycle Pages.
- Finally, test and preview while you’re building, then invite applicants to apply.
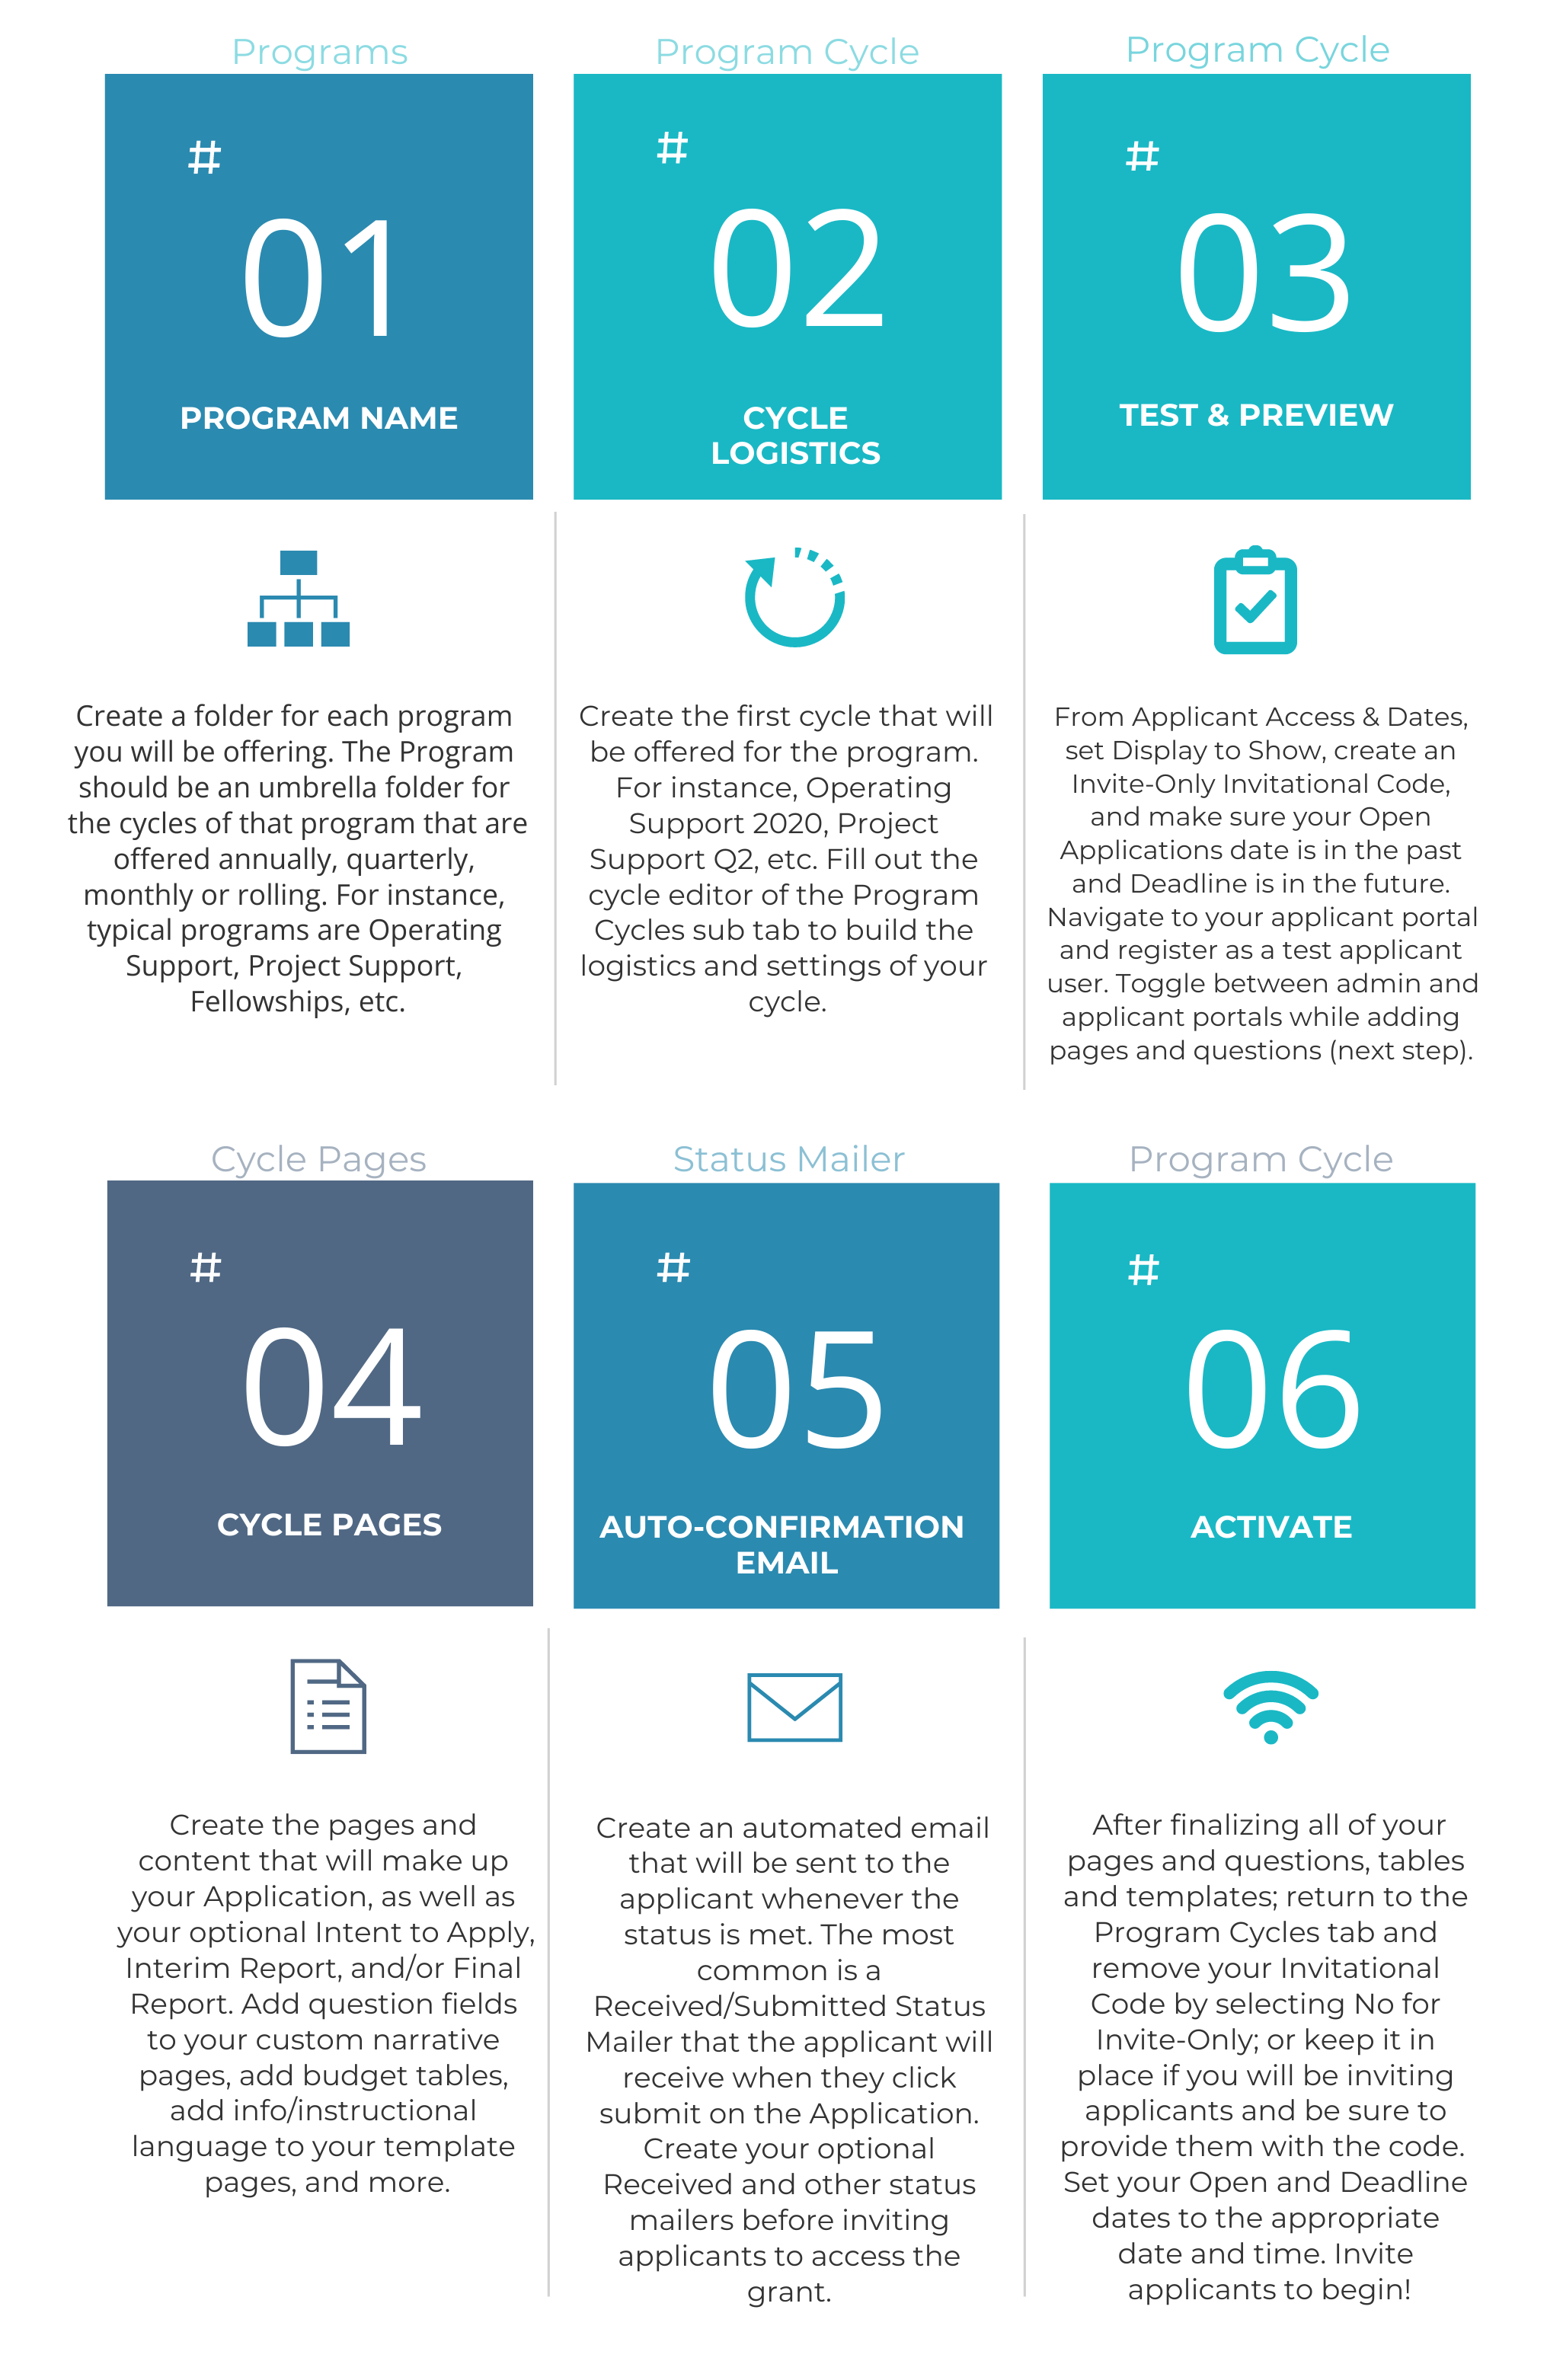 Learn more about each step or subtab here:
 - Programs – Program names
- Program Cycles – Cycle logistics; display the cycle to applicants
- Cycle Pages – Cycle content and pages
- Testing a New Cycle – Test and preview
- If you have a deep understanding of your GO Smart applicant portal, you can just preview the contents of each page by clicking the Preview Page button atop each Cycle Page editor.
- Status Mailer – Auto-confirmation emails
Repeat the steps above to create additional programs and cycles. When you’re ready to create subsequent cycles in any existing program, clone a cycle by following this tutorial. You’ll follow these steps to clone a cycle for the following year, as well as to make any additional forms in the same program. Follow this tutorial to make reimbursement forms, invoices, etc for the same program.