
- Navigate to the Grant Manager tab > Grant Manager Dashboard subtab.
- Select your program and cycle from the drop-down menu.
- Scroll to the Applications by Status table.
- View every status available in this cycle by clicking the view all button (all available statuses to you cycle will be visible in this table).
- Or you can click the blue number to the right of the status to view only the applicants in those statuses.
- You can also filter by statuses, learn how to do so below.
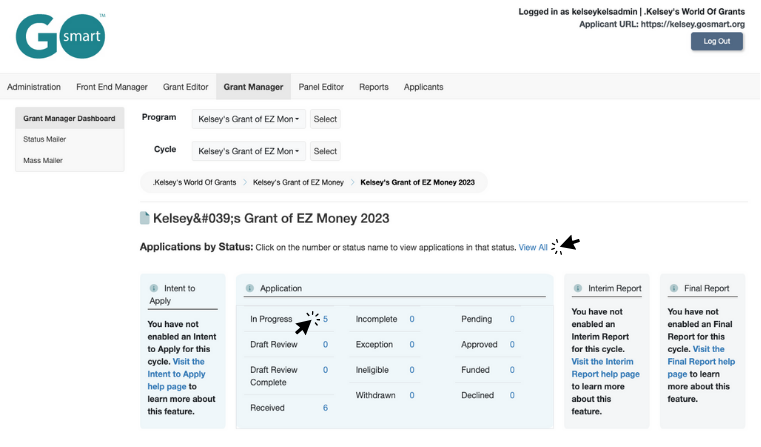
Click the View All link to view all applications at once, or click the number next to the status name to filter the application table by that status.
- Select your program and cycle from the drop-down menu.
- Click View All if you would like to view every application. If there’s a particular status of application (such as Received) or a particular application you’re looking for, use the filter and search functions to narrow down your results.
- Scroll to the applications list below the status table and search/filter box.
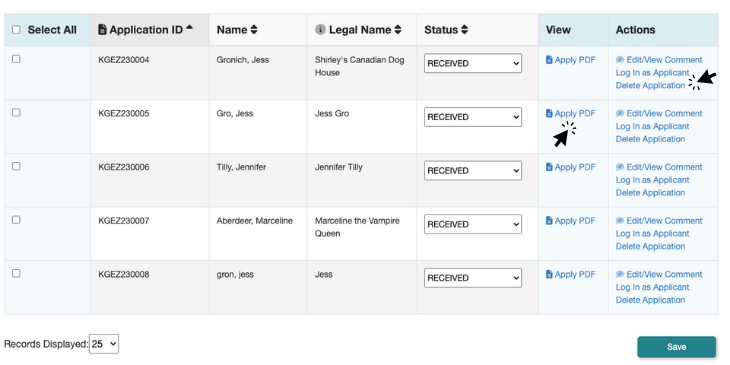
- View your list of applications and use this section to:
- Manually change statuses. Learn more about statuses about changing statuses below.
- Review a read-only form of the applicant’s data by clicking the Intent to Apply, Application, Interim Report and/or Final Report link in the right-side View column. An HTML version will open for onscreen review; this can easily be converted to PDF for printing.
- Add and review internal comments that are only visible to admin and can be included in reports in the Actions column. Be sure to click the teal Save button on the Grant Manager Dashboard after creating or editing comments to save your changes.
- Log in as that user by clicking Login.
- Delete an applicant’s data (use caution, this cannot be undone).
There are many additional functions you can use to view applicant data and manage applications such as adding applicants to panels, adding tags to applications, and viewing start and submit timestamps. Click here to learn how to access these tools by adding additional columns to the applicant table.
We recommend letting the applications table and page fully load before you begin searching the dashboard!
There are a few different ways you can search the Grant Manager Dashboard to find applications – you can search by Name, Legal Name, Application ID, or by Tag.
- Click the search bar to begin typing.
- Type in the name, Application ID #, or tag you’d like to search by. *You will need to type two or more characters for the search to start narrowing down options.
- Hit ‘enter’ on your keyboard or click the teal search button.
- Your search results will load on the page. Click the reset button if you’d like to clear your search.
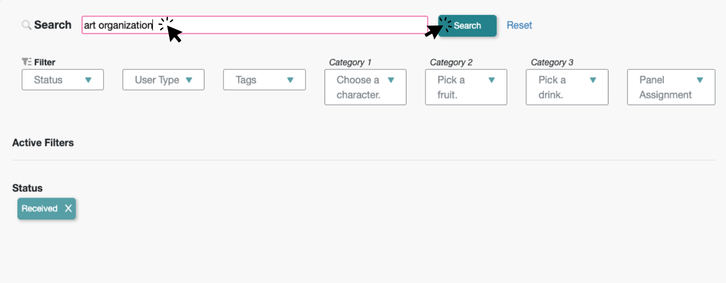
Type the text you would like to search by and then click the Search button to search your applications. If you have any filters applied, the search function will search by applications in that filter. The search results will stay until you switch to a new cycle, clear the search results, or log out.
- Find the applicant that you would like to modify by using the search feature, filtering, or scrolling the page.
- Find the Status column in the middle of the applicant table.
- You will see the applicant’s current status. Click the drop-down to open a list of available statuses.
- Click on the status you wish to move the applicant to.
- Click the Update button in the bottom right corner of the page.
*If you would like to update multiple applications at once, read about the Mass Update feature here.
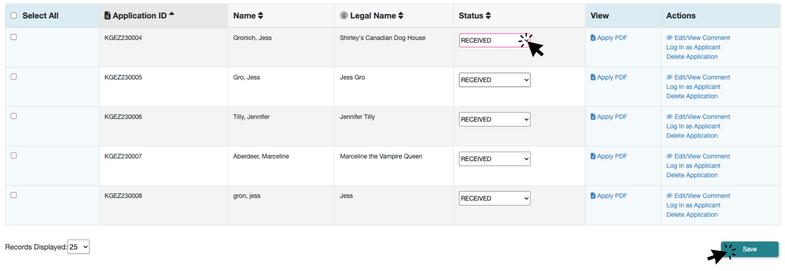
Click the dropdown in the Status column to select a new status for an applicantion. Click the Save button to update the page and move the applicant to the new status. Click here to read more about how different statuses work on GO Smart.
While the Select All, Application ID, Name, Legal Name, Status, View, and Actions columns will always be present on the Grant Manager applications table, up to 4 additional columns at a time can be added to the applications table. You may also sort the applications table by the column headers.
Add more columns to the applications table:
- Click on the Add/Edit Columns button.

- A modal will open with a list of additional columns:
- Username
- User Type
- Website
- Address
- City
- State
- ZIP Code
- Phone
- Started Timestamp
- Submitted Timestamp
- Panel Assignment
- Tags
- Amount Funded
- Category [category question] *Note this text will change based on the question for the category.
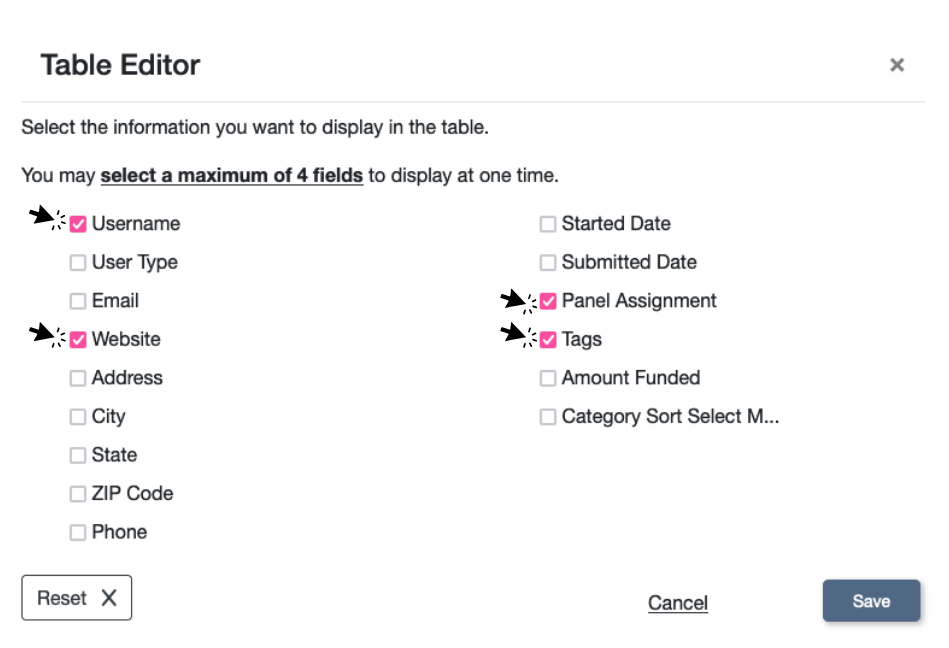
- Select up to 4 additional columns by checking the box next to column names.
- Click the save button to close the modal and apply changes to view the new columns on the table. *Click the cancel button to close the modal without applying any changes.
- If you want to edit your selection click the Add/Edit Columns icon again to re-select the viewable columns. If you would like to reset the columns to default, click the Reset button.
Sort by headers:
Click the up and down arrow icon to sort the headers of a column. All columns are sorted A-Z aside from what is noted below. Only these columns are sortable:
- Application ID
- Sorted by A-Z then numerical
- Name
- Sort by last name
- Legal Name
- Status
- Started Timestamp
- Can be sorted as earliest to latest; latest to earliest
- Submitted Timestamp
- Can be sorted as earliest to latest; latest to earliest
- Panel Assignment
- Amount Funded
- Category
- City
- State
- Make sure you have tags as a viewable column in your applicant table. Click here to how to add/edit table columns.
- Click the Add Tag textbox on the line of the application you would like to add a tag to.
- Type tag name in the textbox. Tags can be up to 12 characters. Note: only alphanumeric characters are accepted.
- Click the Add Tag button. Multiple tags can be added to multiple applications. Note: Up to 5 tags can be added to a single application.
- Existing tags can be searched and selected to be added to an application. Any existing tags will automatically appear if text is typed that matches the tag name.
- To remove a tag from an application, click the X button in the bubble of the tag. Note: You don’t need to hit Save to remove a tag.
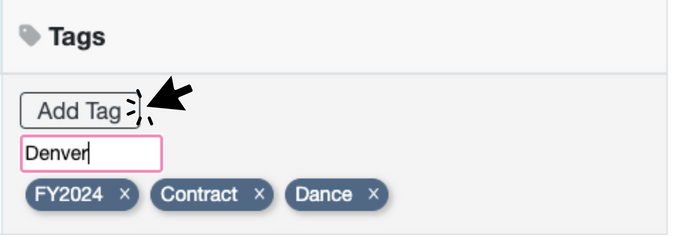
Add tags by typing text in the textbox (up to 12 alphanumeric character) and clicking the Add Tag button. Your created tags for the application will appear under the textbox.
- Select 2 or more applications you would like to edit by checking the boxes in the far left column or select all currently viewed applications by clicking the Select All checkbox.
- The Mass Update button will now be clickable. Click it to open the Mass Update modal.
- Choose either the Status Update or Panel Assignment option.
- Status Update: Select the status you would like to move the applications to from the dropdown menu of available statuses. Click the Save button to move the selected applications to the selected status.
- Panel Assignment: Select the panel you would like to move the applications to from the dropdown menu of available panels. Click the Save button to move the selected applications to the selected panel.
- Note: You must create a panel in order to assign applications to a panel.
- Another note: Only the Intent to Apply Received, Intent to Apply Approved, Received, Pending, Approved and Funded statuses can be added to a panel.
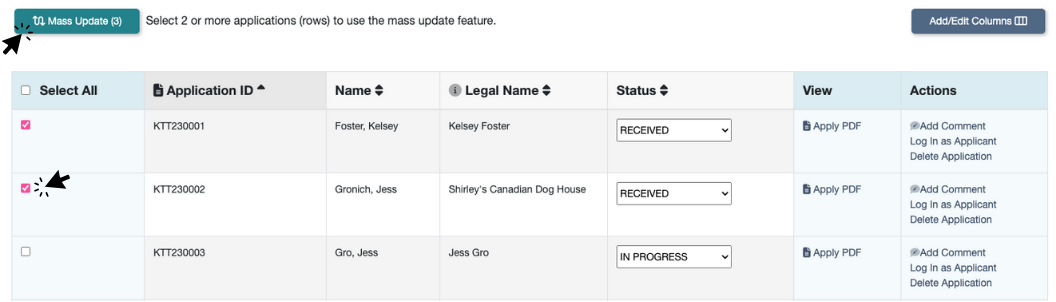
Select the applications you wish to update by checking the boxes in the Select All column. After you’ve selected all of the applications you want ot update, click the Mass Update button.
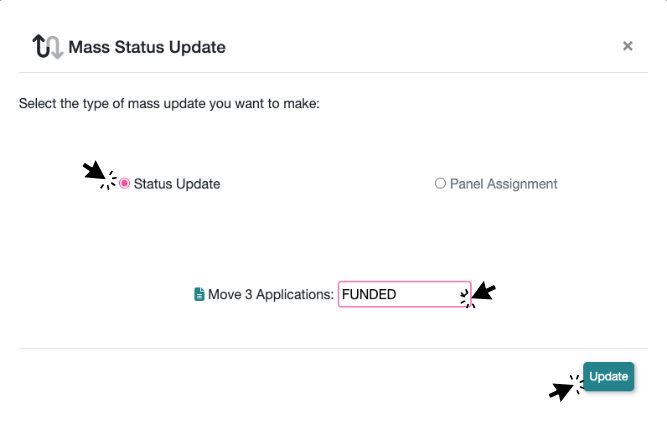
After you’ve opened the Mass Update modal, click the option you would like to mass update the applications for. If you choose Status, you can select a new status to move the applications to in the dropdown. Click the Update button to update the applications.
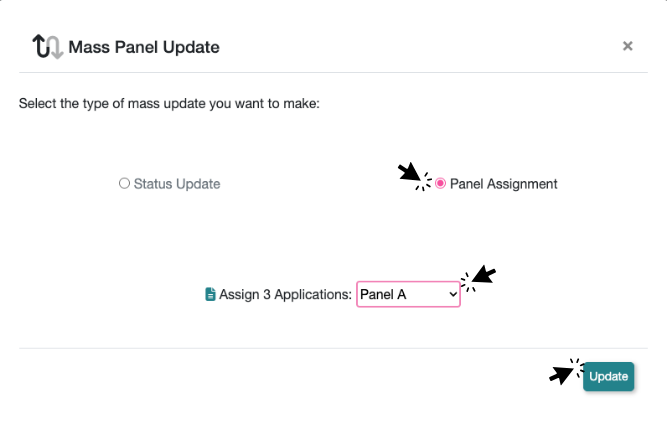
If you’d like to mass update the applications to a panel, after you’ve opened the Mass Update modal, click the Panel option. Select a panel to move the applications to in the dropdown. Click the Update button to update the applications.

If an application that can’t be added to a panel is selected for for the Mass Update panel option, an error will display. De-select that application, then repeat the steps for using the Mass Update modal. Note: Only applications in the Intent to Apply Received, Intent to Apply Approved, Received, Pending, Approved, or Funded status can be added to a panel.