User Editor – Create and Edit Administrative Users

This tutorial will teach you where and how to create or modify administrative and panelist users.
Table of Contents
Add New Admin User
View Steps ✏️
Admin users will have access to the backend of your GO Smart site, but you will be able to manage which admin tabs they have access to.
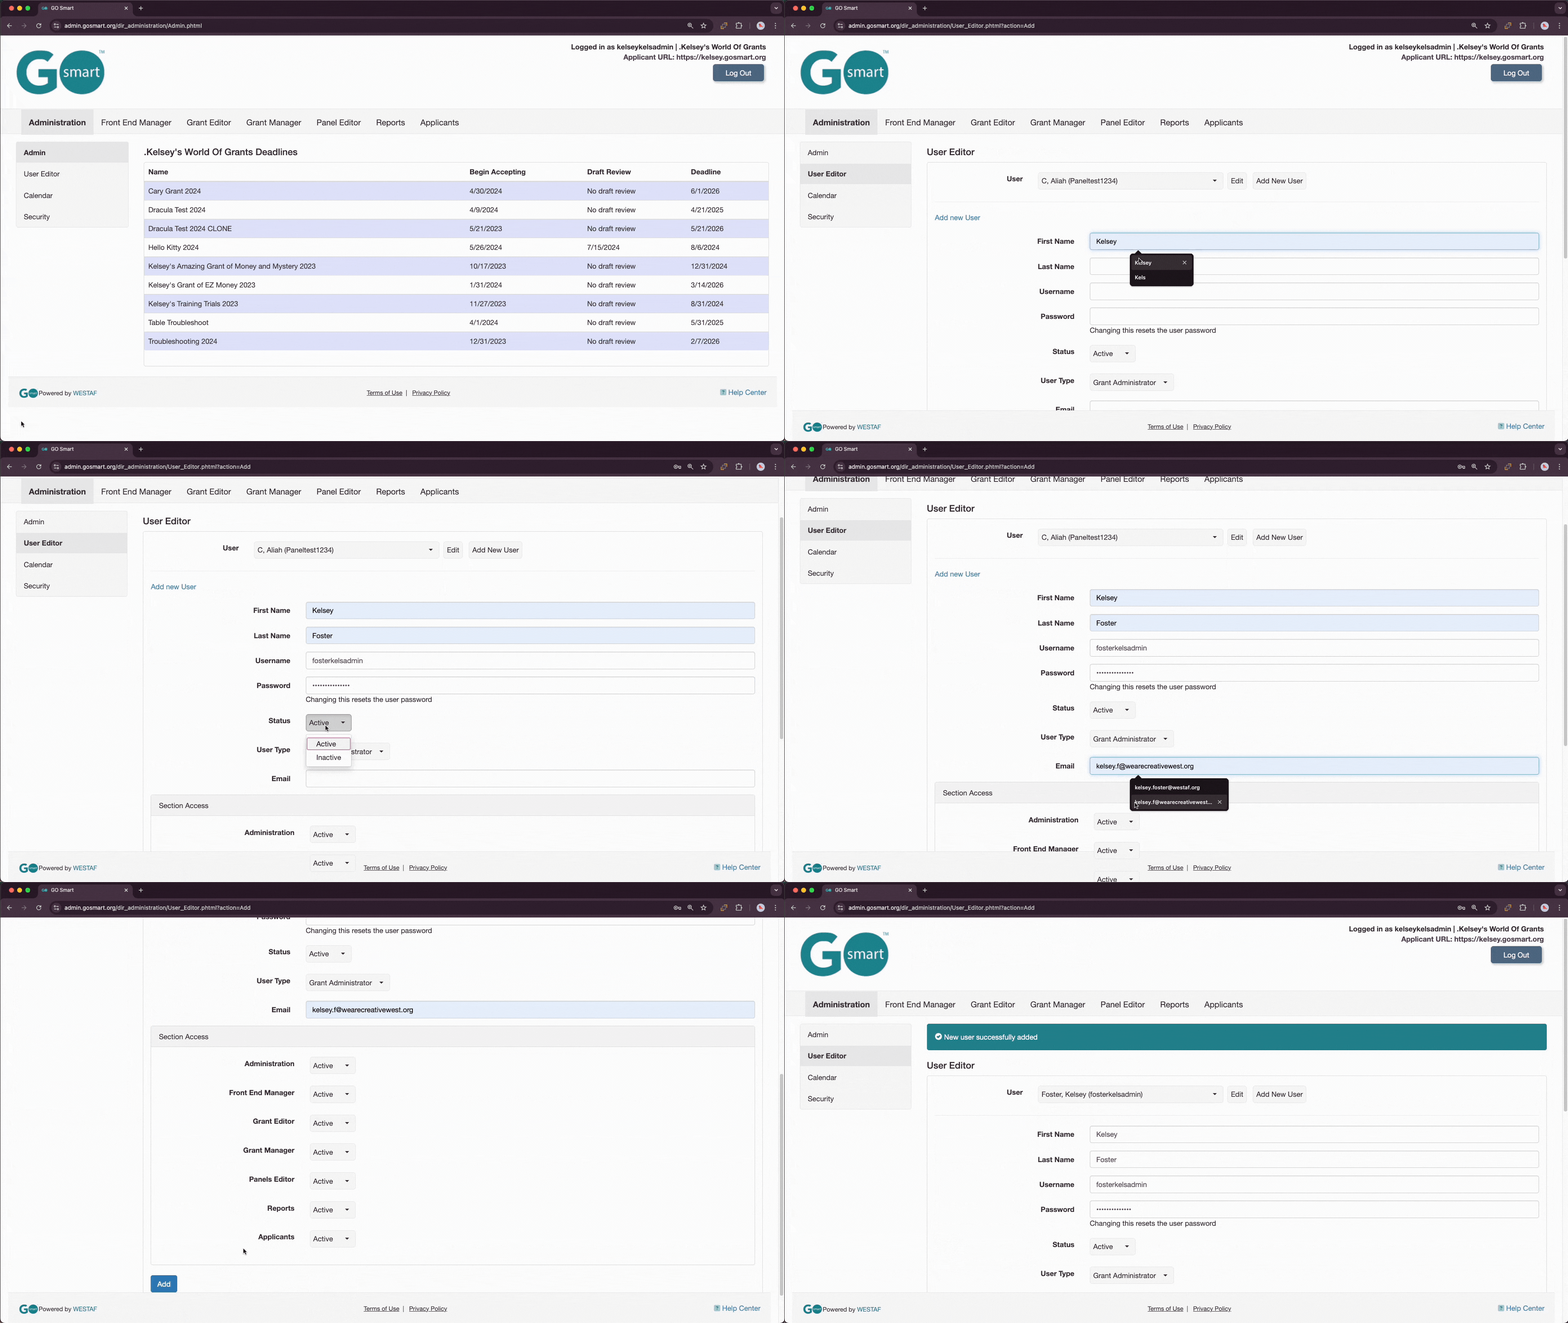
- Navigate to the Administration tab > User Editor subtab.
- Click the Add New User button.
- Complete the fields and select Grant Administrator for User Type.
- Enter a valid email address, this is the address the system will use for the username or password retrieval tools.
- Under the Section Access heading, toggle between Active and Inactive for any of the tabs such as ‘Grant Manager’ or ‘Reports’.
- Click the blue Add button to save and add user.
Note: An admin or panelist cannot reuse a username that already exists in the system, even if it’s from a different GO Smart site. Make sure the username you create for the user is unique.
See in Action ⏩

GIF showing the admin side of GO Smart, navigating from the Administration tab to the User Editor tab. GIF displays clicking ‘Add New User’ and the process of filling out all fields to add a new system (admin or panelist) user.
Edit Existing User
View Steps ✏️
Existing users can be searched using the User drop-down menu. Typing the first letter of a user’s last name into that field will allow you to navigate directly to the list of users with last names that begin with that letter of the alphabet.
- Navigate to the Administration tab > User Editor subtab.
- Find the User you wish to edit in the dropdown.
- Click the gray Edit button left of the Add New User button.
- Make the necessary changes to the user’s information.
- Click the blue Update button at the bottom of the page.
Note: The number of asterisks is not indicative of the number of characters in the user’s password. If you update the password and receive the green message saying “User successfully modified” then your new password has been accepted. Be sure to only test an update by logging in with the new credentials.
Inactivate Existing User 💡
Users cannot be removed from the system. However, you can set their status to Inactive to block their access to the site. Usernames can be changed. It may be most efficient to create new users from inactive accounts and modifying all fields, to lessen the number of inactive users on your site.
Add Panelist User
View Steps ✏️
If you select Grant Admin from the User Type drop down after having selected Panelist, you will see the Section Access section, but all tabs except for Panels will be disabled. You will need to click Update to save the new User Type of Grant Admin, and then return to the editor to reactivate any appropriate sections. We do not recommend converting panelist accounts to admin, but we recognize that User Types may have been selected in error.
- Navigate to the Administration tab > User Editor subtab.
- Click the Add New User button.
- Complete the fields and select Panelist for User Type.
- Enter a valid email address, this is the address the system will use for the username or password retrieval tools.
- Click Add button to save and add user.
